Best Casual Shirts
Home
Guides
POPULAR
How To Style Button Down Shirts
Black Shirt Combination Pants
Shirt Vs T-Shirt
White T Shirt Dress Outfit Ideas
Swim Shirts for Fat Guys
What Color Pants With Black Shirt – Style Guide [2024]
Expert Opinion By
Fashion Writer & Doodler
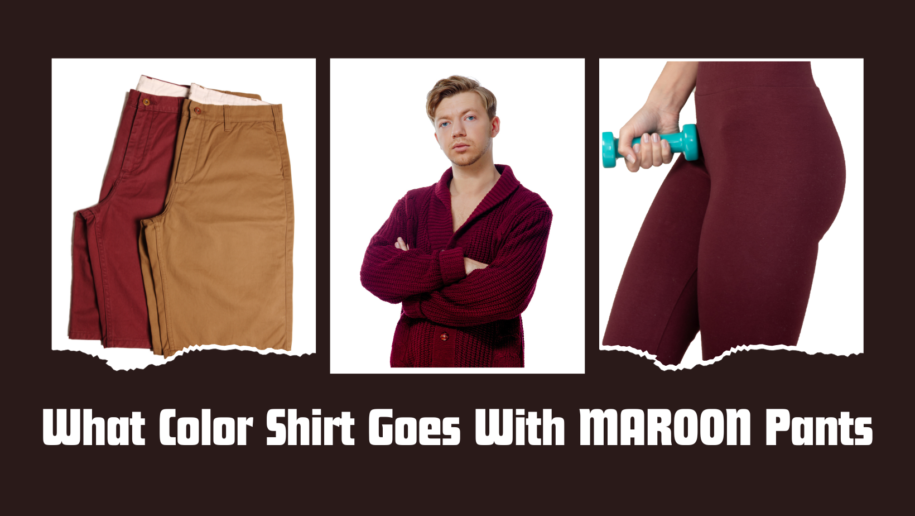
Classy and Bold: What Color Shirt With Maroon Pants For A Striking Outfit
Expert Opinion By
Fashion Writer & Doodler
Green Shirt Dilemma: 6 Tie Colors That Complement Perfectly 2024
Expert Opinion By
Fashion Writer & Doodler
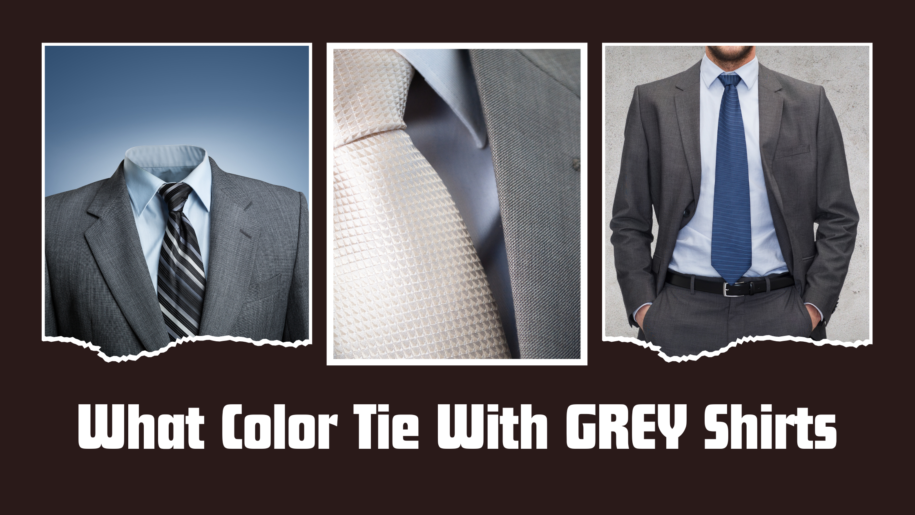
Visual Impact: How to Choose a Tie that Complements Your Grey Shirt Perfectly
Expert Opinion By
Fashion Writer & Doodler
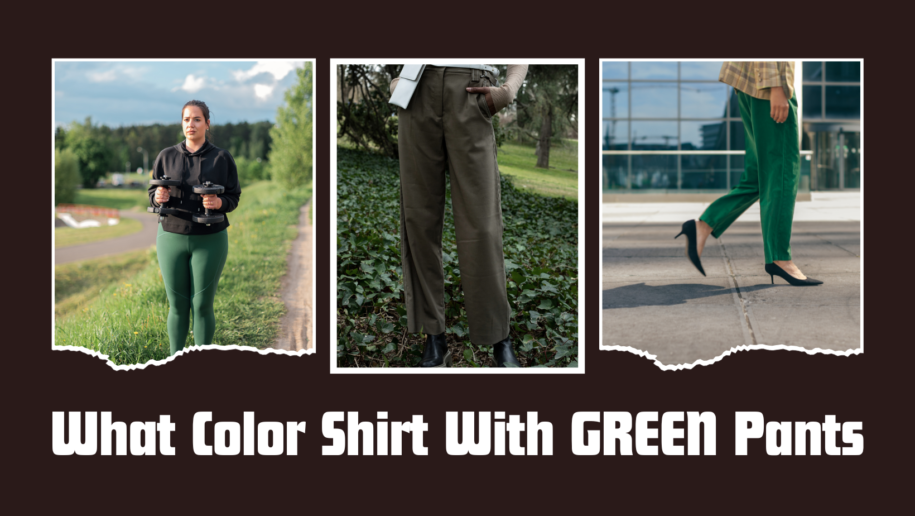
Emerald Ensemble: Pairing Shirts With Green Pants For A Bold Look
Guides
What Color Pants With Black Shirt – Style Guide [2024]
Classy and Bold: What Color Shirt With Maroon Pants For A Striking Outfit
Green Shirt Dilemma: 6 Tie Colors That Complement Perfectly 2024
Visual Impact: How to Choose a Tie that Complements Your Grey Shirt Perfectly
Emerald Ensemble: Pairing Shirts With Green Pants For A Bold Look
Dress To Impress: What Color Shirt Goes With Black Pants For A Classic Look
The Whimsical Palette of Shirts to Complement Blue Pants in 2024
Bold And Beautiful: Chic Shirt Colors To Complement Red Pants
Casual T Shirts That Are Necessary Need For Every Wardrobe
What To Wear On Valentine’s Day? Some Styling Tips
Unbuttoning The Mystery: Button-Up Shirt Vs Button-Down Shirt 2024
Sunny Days Ahead: 2024 Pairing the Perfect Pants with Your Yellow Shirt
Men’s Floral Shirts To Stay Colorful & Vibrant In 2024
How To Style Oversized Shirt | Stylists Recommendations For 2024
How To Wear A Button Down Shirt Open: A Fashionista’s Guide 2024
Purple Shirt Pairings Pants: A Guide to Color Coordination 2024
Casual Shirts For Women To Brightly Start 2024 With!
How To Fix Cracked Print On Shirt – 7 Quick Remedies [2024]
How To Wear Oversized Button Down Shirt – Trendy Outfits For Everyone
2024 Chic Combos: Best Pants Colors For A Pink Shirt Ensemble
Best Long Sleeve Shirts You Should Wear Before It’s Too Late!
How To Wear A Patterned Shirt – 10 Different Styling Ways
How Should A Dress Shirt Fit Properly? The Perfect Dress Shirt Fit
Dress To Impress: Flattering Pants For Your Bold Red Shirt
Pink Shirts For Men: Perfect For Modern Guy Look For 2024
How To Draw A Collared Shirt – Step-By-Step Guide
How To Wrap Clothes For Christmas Presents: 6 Methods To Choose From
Stunning In Maroon: 2024 TOP Trends Pants Picks To Complement Your Shirt
How To Buy A Shirt – Buying Checklist [2024]
How To Wear Cufflinks On A Regular Shirt?
Celebrate The Holidays With These DIY Christmas Shirt Ideas For Your Loved Ones
Mastering Neutrals: What Color Pants With Beige Shirt For Effortless Elegance
T-Shirt vs Polo – Key Differences of Two Iconic Basis [2024]
How To Wear A Men’s Shirt As A Woman: 9 Stylish & Functional Ways
How To Design A Custom Christmas Tree Shirt In 2024
Harmonizing Pants With A White Shirt: A Detailed Style Analysis 2024
Linen Shirt Outfit – The Perfect Summer Dress
How To Fix A Stretched Out Shirt: [Neckline, Collar, Sleeve Tips]
Christmas Tree Dresses: A Great Choice for a Unique Holiday Look
Styling Made Simple: What Color Shirt Goes With White Pants 2024
Difference Between Shirt And T-Shirt
6 Best Swim Shirts For Fat Guys – Non-Clingly Shirts
How To Make A DIY Dress Form Christmas Tree In 2024
What Color Shirt with Grey Pants? 8 Picks for A Modern Wardrobe
Clever Ways To Wear A Collarless Shirt With Suit In 2024
How to Fix a Messed Up Tie Dye Shirt: The Ultimate Guide
How The Grinch Stole Christmas Costumes: The Ultimate Guide To DIY Costumes
Perfect Pair: Unveiling the Best Shirt Colors for Brown Pants
Bowling Attire For Ladies – Cute Bowling Outfits
How To Acid Wash A Shirt – Quick DIY Procedure In 2024
How Unisex Shirts Fit On Women With A Larger Bust – Definitive Guide [2024]
Create Impactful Outfits: What Color Shirts With Khaki Pants For A Fashion Statement
The Best Way To Wear Dark Blue Shirt and Black Pants – Style Advice [2024]
How to Remove Sublimation Ink from Shirt: Effective Remedies [2024]
What Color Pants Go With Navy Blue Shirt – 09 Options To Try In 2024
How Does Thermal Clothing Work In Fall Season 2024
How To Wear A Shirt Over A Dress: The Ultimate Guide [2024]
Business Casual Shirts: The Perfect Office Look Ever
Best Day Ever Disney Shirts – Updated List For 2024
Top 6 Most Popular T-Shirt Colors Trend In 2024
How To Fold A Collared Shirt For Travel – The Right Way
Embracing the Spectrum: The Art of Pairing Pants With Green Shirts In 2024
Black Shirts For Men You Should Have For The Year 2024
9 White T-Shirt Dress Outfit Ideas For Every Day
How To Style A Button Down Shirt – 6 Stylish Ways In 2024
Grey Shirt Guide: 11 Pants Colors That Elevate Your Style Instantly
Best White Shirts For Men To Glare Up 2024
How To Layer Clothes For Winter – Stay Warm & Stylish
Mastering the Art of Tying a Button Down Shirt – Easy Hacks For 2024
Mix And Match: What Color Pants Go With Brown Shirt For A Stylish Ensemble
![What Color Pants With Black Shirt – Style Guide [2024]](https://bestcasualshirts.com/wp-content/uploads/2023/12/What-Color-Pants-With-Black-Shirt-915x516.png)